The landscape of artificial intelligence is moving at a breakneck pace, and nowhere is this more evident than in the realm of video generation. Just a few short years ago, generating a coherent video from a static image felt like science fiction. Today, anyone with a computer and an internet connection can transform a still photograph into a cinematic masterpiece. However, as the technology has advanced, so too have the paywalls. The market is saturated with platforms that offer a quick taste of their capabilities before locking you behind steep monthly subscriptions, rigid credit systems, intrusive watermarks, and overly aggressive content filters. Get the Best information about free ai image to video no restrictions.
For creators, filmmakers, marketers, and hobbyists who want to push the boundaries of their creativity, these limitations are frustrating. If you are tired of running out of credits mid-project or having your creative vision blocked by an arbitrary filter, you are in the right place. The open-source community has fought back against corporatized AI, providing an ecosystem of Free AI image-to-video tools with no restrictions. You may Discover uncensoredai.video.
In this comprehensive guide, we will dive deep into the world of unrestricted AI video generation. Whether you are looking for the ultimate ai video maker, seeking a reliable Stable Video Diffusion installation guide, or trying to figure out how to animate photos without subscription, this article will serve as your ultimate blueprint. We will explore everything from setting up local environments and comparing cloud versus local rendering, to advanced prompt engineering and fixing temporal consistency.
Let’s unlock the true potential of unrestricted AI video creation.
1. The Reality of the AI Video Market: Why “Free” Rarely Means Free
Before we dive into the specific tools, it is crucial to understand the current state of the market. If you search for an ai video generator online, you will be bombarded with dozens of platforms claiming to be “free.” However, a closer look usually reveals a different story.
Most mainstream platforms operate on a freemium model. They might give you 50 free credits to start, but rendering a high-quality three-second clip might cost 15 credits. Once you run out, you are forced to wait 24 hours or open your wallet. Furthermore, these platforms often enforce strict content moderation, meaning even slightly edgy, dark, or stylistically complex prompts are rejected outright.
To find true freedom, we must look away from mainstream commercial platforms and turn our attention to the open-source community. This is where you find AI video tools with no daily usage caps, No watermark AI video generators, and AI video generators with no content filters.
The Shift to Open Source
The open-source AI community operates on the philosophy that artificial intelligence should be accessible to everyone. By utilizing models whose weights have been released to the public, developers have created graphical user interfaces (GUIs) that allow you to run these models on your own hardware or via free cloud notebooks. This gives you complete ownership over your workflow.
2. Text-to-Video vs. Image-to-Video: Understanding the Mechanics
To truly master any free ai image to video workflow, you need to understand the underlying mechanics of how these models interpret data. There is a distinct difference in how AI handles text versus how it handles visual inputs.
Text-to-Video (T2V)
Text-to-video models generate moving images entirely from a written prompt. You type “A cinematic shot of a cyberpunk city in the rain,” and the AI attempts to dream up the geometry, lighting, characters, and motion from scratch.
- Pros: Requires no initial visual assets; pure imagination.
- Cons: Highly unpredictable. Characters may mutate, the composition might not match your vision, and maintaining a specific aesthetic is incredibly difficult.
Image-to-Video (I2V)
Image-to-video models, on the other hand, take a static image as a starting point (the “first frame”) and use text prompts and motion algorithms to animate it.
- Pros: Incredible control over composition, character consistency, and lighting. You can use Midjourney, Stable Diffusion, or a real photograph to establish the exact look you want before animating it.
- Cons: Requires a two-step process (generating/finding the image first, then animating).
When comparing Text to video vs image to video output, professional creators almost exclusively prefer the Image-to-Video workflow. It allows for storyboarding, ensures character consistency, and minimizes the AI’s tendency to hallucinate strange geometric shapes. For the rest of this guide, we will focus primarily on I2V workflows.
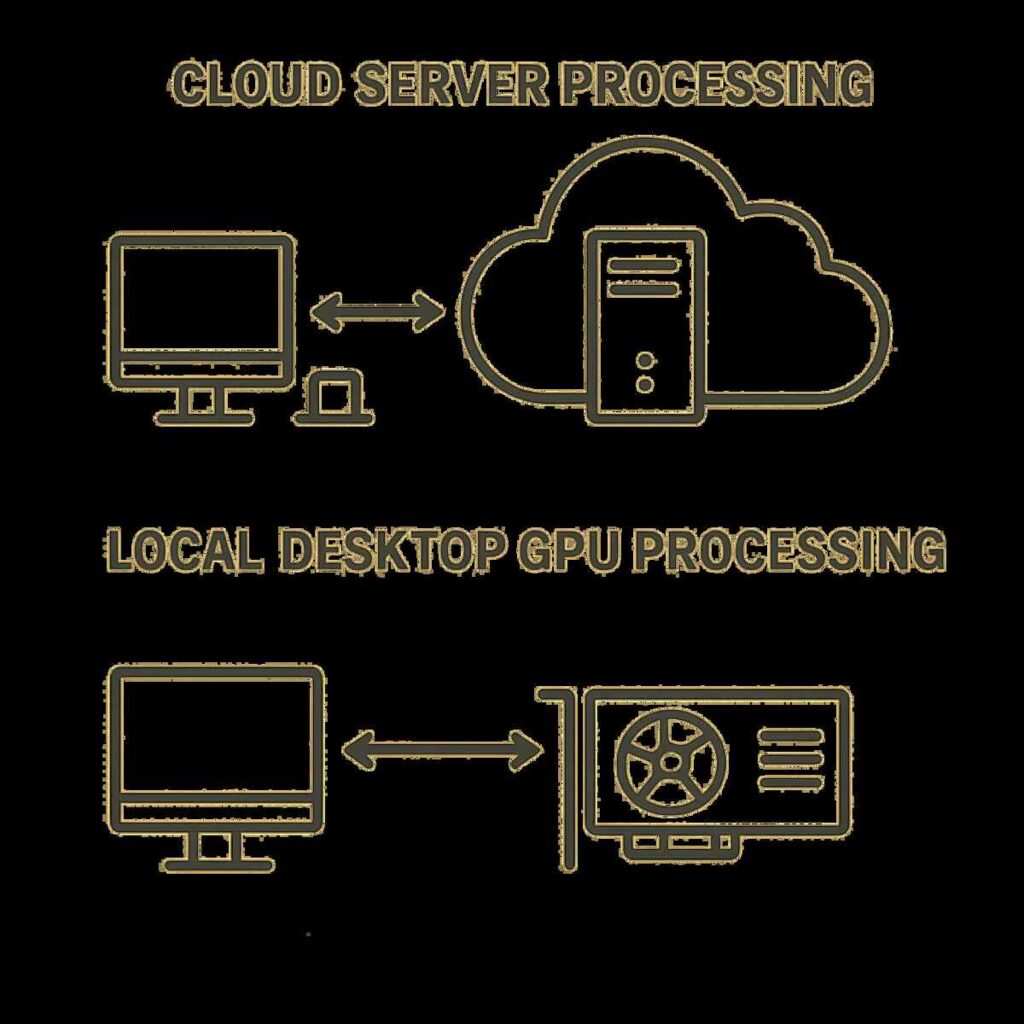
3. Cloud-Based vs. Local GPU Rendering: Choosing Your Workspace
When deciding how to run your Unlimited credits AI animation tools, you have two primary options: doing it in the cloud or running it locally on your own machine. Understanding Cloud-based vs local GPU rendering is essential for setting up an unrestricted workflow.
Cloud-Based Rendering (Google Colab, RunPod, Kaggle)
If you do not have a powerful computer, you can run open-source models on cloud servers.
- The “Free” Cloud: Services like Google Colab offer free tiers that give you access to a GPU (usually a T4). You can load Jupyter notebooks that run AI video models directly in your browser.
- The Catch: Google Colab’s free tier has hidden usage limits. If you render too much, you will be temporarily disconnected.
- Paid Cloud (Uncapped): Platforms like RunPod or Vast.ai let you rent powerful GPUs (like an RTX 4090) for pennies an hour. While not technically 100% free, it bypasses all subscription models and content filters, allowing unrestricted generation for pocket change.
Local GPU Rendering
This is the holy grail of unrestricted AI video. By downloading Locally hosted AI video software, you turn your computer into a personal server.
- Pros: 100% free forever. Complete privacy. No internet connection required once set up. Zero content filters. Unlimited generations.
- Cons: Requires a powerful graphics card (GPU). For most AI video models, you need an Nvidia GPU with a minimum of 8GB of VRAM (12GB to 24GB is highly recommended).
4. The Top Open Source Image to Video Models
Let’s look at the engines that power these workflows. These are the Open source image to video models that have revolutionized the industry, serving as the Best free alternatives to Runway Gen-3 and Sora.
1. Stable Video Diffusion (SVD)
Created by Stability AI (the makers of Stable Diffusion), SVD is currently the gold standard for open-source image-to-video generation. It excels at taking a highly detailed image and adding realistic, fluid motion. It comes in two primary variants: SVD (generates 14 frames) and SVD-XT (generates 25 frames). It is heavily optimized for localized, cinematic motion.
2. AnimateDiff
While technically older than SVD, AnimateDiff remains incredibly popular. Rather than being a standalone model, AnimateDiff acts as a “motion module” that plugs into existing Stable Diffusion 1.5 or SDXL models. This means if you have an anime-style model or a hyper-realistic photography model, you can inject AnimateDiff into it to make it move. It is phenomenal for stylized animations and music videos.
3. DynamiCrafter
DynamiCrafter is a newer model tailored specifically for high-resolution, dynamic image animation. It excels in looping animations and creating looping backgrounds from still images. It often handles complex prompt-guided motion better than standard SVD.
4. CogVideoX
Recently open-sourced by Zhipu AI, CogVideoX is making massive waves as one of the most powerful 3D-aware video diffusion models available to the public. While computationally heavy, it produces some of the most coherent, temporally consistent video clips seen outside of closed-source giants like Runway or Luma.
5. Setting Up Locally Hosted AI Video Software
To utilize these open-source models, you need an interface. The days of needing to be a Python coding expert to run AI models are over. Today, we have visual, node-based interfaces and simple one-click installers.
The Champion: ComfyUI
ComfyUI is the most powerful Locally hosted AI video software available today. It uses a node-based interface, meaning you connect virtual “cables” from one block (like “Load Image”) to another (like “Apply Motion Model”). It is incredibly memory efficient, meaning it can run complex video generation on GPUs with lower VRAM.
The Easy Route: Pinokio
If the idea of installing Python, Git, and command-line tools terrifies you, you need to use Pinokio. Pinokio is a standalone browser that lets you install, run, and control complex AI applications with a single click. You can install ComfyUI, Automatic1111, or dedicated SVD web apps through Pinokio without touching a single line of code.
6. Comprehensive Stable Video Diffusion Installation Guide
Because SVD is the most popular starting point, we are going to walk through a complete Stable Video Diffusion installation guide using ComfyUI. This will give you a private, offline, uncensored video studio on your PC.
Prerequisites
- An Nvidia GPU (RTX 2000, 3000, or 4000 series) with at least 8GB of VRAM.
- At least 30GB of free hard drive space (SSD or NVMe highly recommended).
- Windows 10/11 or Linux.
Step 1: Install ComfyUI
- Go to the official ComfyUI GitHub repository.
- Scroll down to the “Installing” section and download the standalone Windows standalone build.
- Extract the downloaded .7z file using a program like 7-Zip to a dedicated folder (e.g., C:\AI\ComfyUI).
- Inside the extracted folder, double-click run_nvidia_gpu.bat. This will launch the ComfyUI interface in your default web browser (usually at http://127.0.0.1:8188).
Step 2: Download the SVD Models
You need the actual “brain” of the AI, known as a checkpoint model.
- Create an account on HuggingFace (the primary repository for open-source AI models).
- Search for stabilityai/stable-video-diffusion-img2vid-xt.
- Go to the “Files and versions” tab and download the svd_xt.safetensors file (it is quite large, around 9GB).
- Place this downloaded file into your ComfyUI directory: ComfyUI\models\checkpoints.
Step 3: Load the SVD Workflow
ComfyUI requires a “workflow” (the specific arrangement of nodes) to tell it how to process the video.
- Download a default SVD workflow JSON file from the ComfyUI examples page on GitHub.
- Open your ComfyUI interface in your browser.
- Drag and drop the downloaded JSON file directly onto the browser window, or click the “Load” button on the floating menu and select the file.
- You will now see a visual map of nodes on your screen.
Step 4: Generating Your First Video
- On the far left of the node map, locate the “Load Image” node. Click “choose file to upload” and select a high-quality starting image. (Tip: Images resized to 1024×576 work best for SVD).
- Locate the “Load Checkpoint” node and ensure svd_xt.safetensors is selected in the dropdown menu.
- Click the “Queue Prompt” button on the floating menu.
- Wait. The nodes will light up green as they process. Depending on your GPU, this could take anywhere from 30 seconds to 5 minutes.
- Once complete, your video will appear in the “Video Combine” or “Save AnimatedWEBP” node on the far right. You can right-click and save it to your computer!
Congratulations! You now have a fully functional, uncensored, zero-cost AI video generator running locally on your hardware.
7. Fixing Temporal Consistency in AI Clips
One of the most glaring issues with AI video is “morphing” or “flickering,” where objects in the background shift, colors flash, and human faces distort as the video plays. This is known as a lack of temporal consistency.
When searching for the Best free alternatives to Runway Gen-3, you will notice that Runway’s main selling point is how smooth its videos are. However, you can achieve this level of smoothness for free by utilizing specific Fixing temporal consistency in AI clips techniques within your local workflows.
1. Using ControlNet for Structural Integrity
If you are using AnimateDiff to animate a video (video-to-video) rather than just an image, ControlNet is your best friend. ControlNet locks in the structure of your video.
- Depth ControlNet: Analyzes your starting image/video and creates a 3D depth map. It forces the AI to respect the foreground and background, stopping the background from melting into the subject.
- LineArt/Canny ControlNet: Draws hard outlines around the subjects in your initial image. The AI is forced to keep its generations inside these lines, drastically reducing shape-shifting.
2. Lowering the Motion Scale
In SVD, there is a parameter called motion_bucket_id. This controls how much movement the AI tries to inject into the scene.
- A high motion bucket (e.g., 150+) will force the AI to move the camera dramatically or make characters run. Because the AI has to “guess” what is behind the moving objects, it hallucinates, causing flickering.
- Actionable Tip: If your video is morphing too much, lower your motion_bucket_id to around 40-70. You will get a more subtle, cinematic pan with significantly less distortion.
3. Deflickering Post-Processing Tools
Sometimes, the raw output from an AI model will naturally have a slight brightness flicker. Instead of regenerating the video and wasting time, you can fix this in post-production. Free tools like DaVinci Resolve have deflicker plugins, or you can use open-source command-line tools like FFmpeg with deflicker scripts to smooth out the frame-by-frame exposure changes.
8. High Resolution Image to Video Workflows
A common complaint about free and open-source models is that they generate relatively low-resolution outputs (usually 576×576 or 1024×576). If you want to use these clips in a YouTube video, a short film, or a commercial project, you need them in 1080p or 4K at 60 Frames Per Second (FPS).
To achieve this, professional creators utilize High resolution image to video workflows, which involves a two-step post-generation process: Upscaling and Frame Interpolation.
Step 1: AI Upscaling
You cannot just stretch a 576p video in Premiere Pro and expect it to look good; it will become pixelated and blurry. Instead, you must use AI upscalers that “hallucinate” new pixels to add genuine detail to the image.
- Topaz Video AI: (Paid, but the industry standard).
- Upscayl (Free/Open Source): Upscayl is an incredible desktop application that upscales images. For video, you can extract the frames of your AI video (using a tool like Flowframes or FFmpeg), run all the individual frames through Upscayl, and stitch them back together.
- ComfyUI Ultimate SD Upscale: You can actually upscale your video directly inside ComfyUI using an upscaling node like “Ultimate SD Upscale” alongside an ESRGAN model. This applies a slight AI pass over your video, refining the details while blowing up the resolution.
Step 2: Frame Interpolation (Smooth Motion)
SVD and AnimateDiff usually generate videos at 8 to 14 frames per second. This looks choppy, almost like stop-motion claymation. To get buttery-smooth cinematic motion, you need to interpolate the frames.
- Flowframes (Free/Open Source): Flowframes is a fantastic GUI that utilizes RIFE (Real-Time Intermediate Flow Estimation) AI.
- How it works: You feed your 14fps AI video into Flowframes, and the RIFE algorithm analyzes frame 1 and frame 2, then uses AI to generate a brand new “in-between” frame.
- The Result: You can easily turn an 8fps AI clip into a 60fps slow-motion masterpiece with zero loss in quality.
9. Prompt Engineering for Cinematic AI Motion
Whether you are using a text-to-video model or an image-to-video model that accepts prompt conditioning (like AnimateDiff or certain SVD implementations), knowing how to talk to the AI is paramount.
Prompt engineering for cinematic AI motion is vastly different from prompting for still images. When generating a still image, you describe the subject. When generating a video, you must describe the camera and the action.
The Rule of Cinematic Prompting
Do not just say, “A man walking.” The AI needs context for the lens, the movement, and the environment. Use this formula: [Subject] + [Action] + [Environment/Lighting] + [Camera Movement] + [Lens/Film type]
Essential Camera Prompts
Adding these specific phrases to your positive prompt will force the AI to simulate professional camera gear:
- Dolly in / Dolly out: Moves the camera physically closer or further away from the subject.
- Pan left / Pan right: Rotates the camera horizontally.
- Tracking shot: The camera follows a moving subject at a consistent distance.
- Drone shot / Aerial view: Forces a high-angle, sweeping perspective.
- Rack focus: Shifts the focus from the background to the foreground (or vice versa) during the clip.
Example of a Master Prompt:
“Cinematic tracking shot, a lone astronaut walking across the red sands of Mars, heavy dust storm, glowing visor, low angle shot, 35mm lens, anamorphic flare, slow motion, hyper-realistic, 8k resolution, photorealistic.”
Using Negative Prompts
In local tools, you have the power of the negative prompt—telling the AI what not to do. To prevent morphing and low-quality outputs, always include a robust negative prompt:
“morphing, mutating, extra limbs, watermark, text, low resolution, blurry, jittery, fast motion, cartoon, 3d render, distorted faces.”
10. Breaking Down the Best Generous Freemium Tools
While local hosting is the ultimate solution for AI video tools with no daily usage caps, not everyone has a $1,000 Nvidia graphics card. If you are stuck on an old laptop, you might still need cloud-based solutions.
While avoiding the restrictive paywalls of Runway Gen-3 and Sora, there are several incredibly generous platforms that currently offer massive free tiers as they are in their beta or research phases. These serve as excellent alternatives if local hosting isn’t an option.
1. Kling AI (By Kuaishou)
Kling AI emerged as a massive competitor to Sora. It excels in photorealism, physics simulation (like eating food or interacting with water), and temporal consistency.
- The Free Tier: As of its global launch, Kling offers a very generous daily allowance of free credits, allowing users to generate several high-quality 5-second clips every single day.
- Why it rocks: The prompt adherence and physical logic are currently unmatched by most open-source models. It handles complex actions incredibly well.
2. Luma Dream Machine
Luma AI released Dream Machine, a highly capable text-to-video and image-to-video model.
- The Free Tier: Luma gives users 30 free generations per month.
- Why it rocks: It features a remarkably simple web interface. You can upload an image, type a short prompt, and get a 5-second video in minutes. It also allows you to upload a “start frame” and an “end frame,” and the AI will brilliantly animate the transition between the two images.
3. Haiper AI
Founded by ex-Google DeepMind researchers, Haiper is a highly stylized AI video generation tool.
- The Free Tier: Haiper has historically offered completely free, unlimited short generations (up to 2 seconds) during its beta phases, with generous caps on longer videos.
- Why it rocks: It is fantastic for artistic, painterly, and heavily stylized animations. It also features built-in tools for repainting specific parts of a video.
Important Note on Freemium Models: Always remember that “free” cloud platforms are heavily monitored. They do have content filters, and their free tiers can be revoked or drastically reduced at any time once they exit beta. This is why learning to use Locally hosted AI video software is the only way to future-proof your workflow.
11. Exploring Commercial Use Rights for AI Video
As you become proficient in generating AI video, a natural question arises: “Can I sell this?” Whether you are looking to create stock footage, music videos for clients, or assets for a video game, understanding Commercial use rights for AI video is critical.
The legal landscape surrounding AI is complex and constantly evolving. However, when using Free AI image-to-video tools with no restrictions, the rules generally depend on the license of the specific model you are using.
Open Source Model Licenses
- Stable Video Diffusion (SVD): When Stability AI first released SVD, it was released under a non-commercial research license. This meant you could not legally use raw SVD outputs for commercial gain without a paid enterprise membership. Always check the current HuggingFace license agreement for the specific model weights you download.
- AnimateDiff: The AnimateDiff motion modules are generally open for commercial use, but they depend on the base model you use. If you use AnimateDiff with a base SD 1.5 model (which allows commercial use), you are generally in the clear. If you use a custom model from Civitai that specifies “Non-Commercial Use Only,” you cannot sell the video.
- Apache 2.0 and MIT Licenses: Many newer models (like certain iterations of CogVideoX) are released under highly permissive licenses like Apache 2.0. This allows for full commercial use, modification, and distribution.
The Copyright Conundrum
In the United States, the current stance of the Copyright Office is that fully AI-generated content cannot be copyrighted because it lacks “human authorship.”
- What this means for you: If you generate an AI video and put it in a commercial film, you can legally sell the film. However, you cannot stop someone else from downloading that specific AI clip and using it in their own project.
- How to protect your work: To gain copyright protection, you must prove significant human intervention. Taking an AI video, heavily editing it in Premiere Pro, color grading it, adding extensive visual effects, and integrating it into a larger human-directed narrative usually meets the threshold for copyrighting the final product.
Disclaimer: I am an SEO specialist and content writer, not a lawyer. Always consult legal counsel regarding copyright and commercial usage in your specific jurisdiction.
12. Use Cases: What Can You Actually Do With Unrestricted AI Video?
Now that you have the tools, the knowledge to bypass restrictions, and the workflows to achieve high-resolution, smooth footage, what do you do with it? Here are some of the most lucrative and creative applications for ai video maker tools right now.
1. Music Videos and Visualizers
The music industry has rapidly adopted AI video. Because open-source tools like AnimateDiff allow for prompt scheduling (changing the prompt at specific frame intervals), you can sync visual changes to the beat of a song. Indie musicians who cannot afford a $10,000 video shoot are using local AI video generators to create trippy, cinematic, and captivating visualizers for YouTube and Spotify.
2. Video Game Assets and Backgrounds
Indie game developers are using tools like DynamiCrafter to animate static backgrounds for visual novels, RPGs, and menu screens. By uploading an image of a fantasy tavern and prompting for “flickering firelight, subtle dust particles, gentle camera sway,” developers can create looping, atmospheric backgrounds in minutes without hiring an animator.
3. Advertising and B-Roll Footage
Marketing agencies are constantly in need of B-roll footage. Instead of paying hundreds of dollars for a stock video subscription, marketers can generate specific, tailored B-roll. Need a shot of a futuristic sports car driving through a neon city for a Facebook ad? Generate the car in Midjourney, animate it in ComfyUI with SVD, upscale it, and drop it into your timeline.
4. Revitalizing Archival Photos (How to animate photos without subscription)
Historians, documentarians, and genealogy enthusiasts are using I2V tools to bring old photographs to life. By taking a restored black-and-white photo of a historical figure or a great-grandparent, you can use subtle motion prompting to make them blink, turn their head, or smile, adding a profound layer of emotion to historical storytelling.
13. Troubleshooting Common Local AI Video Errors
Running powerful AI models on your own hardware gives you freedom, but it also makes you your own IT department. If you are diving into Locally hosted AI video software, you will inevitably run into some errors. Here is how to fix the most common ones.
Error: “CUDA Out of Memory” (OOM)
This is the most common error in AI generation. It means your graphics card does not have enough VRAM to process the video frame size and length you requested.
- The Fix:
- Reduce the resolution of your starting image (e.g., scale down from 1024×576 to 768×432).
- Reduce the number of frames being generated (e.g., drop from 25 frames to 14 frames).
- If using ComfyUI, ensure you are using the –fp16 or –lowvram command line arguments in your startup batch file. This forces the model to run in a lower precision mode, saving massive amounts of memory with almost zero visual quality loss.
Error: The Output Video is Just a Black Screen
A completely black screen usually indicates a failure in the VAE (Variational Autoencoder) decoding process, or that the generation resulted in “NaN” (Not a Number) values due to numerical instability.
- The Fix:
- Ensure you have the correct VAE loaded for your specific model.
- Switch your VAE decoding setting in ComfyUI from fp16 to fp32.
- Sometimes, an overly complex negative prompt can break the math of the generation. Try simplifying your prompt.
Error: Extreme Distortion and “Deep Dream” Artifacts
If your video looks like a psychedelic nightmare with eyes and random shapes appearing out of nowhere, your AI is “overbaking.”
- The Fix: Lower your CFG (Classifier Free Guidance) scale. The CFG scale dictates how strictly the AI follows your text prompt. For image-to-video, a CFG scale that is too high will destroy the image. Keep it low—usually between 1.5 and 3.0 for SVD.
14. The Future of Unrestricted AI Video Generation
We are currently in the wild west of AI video generation. The rapid progression from blurry, jittery GIFs to high-definition, temporally consistent short films has happened in less than two years.
As hardware becomes more powerful and optimization techniques (like model quantization) improve, running massive models locally will become even easier. We are already seeing the beginnings of real-time AI video generation, where the AI generates frames instantly based on webcam input or real-time game engine data.
Furthermore, the gap between closed-source giants (like OpenAI’s Sora) and open-source models is closing. The open-source community is highly collaborative. When a new paper is published detailing a better way to handle video physics, independent developers implement it into tools like ComfyUI within days.
By investing your time now into learning these Free AI image-to-video tools with no restrictions, you are future-proofing your creative skills. You are stepping away from the reliance on expensive subscriptions and taking ownership of your artificial intelligence workflow.
Conclusion: Reclaiming Your Creative Freedom
The AI video revolution should empower creators, not limit them with paywalls, watermarks, and censorship. As we have explored in this guide, the tools for absolute creative freedom already exist; they just require a bit of setup and a willingness to learn.
From understanding the core differences between Text to video vs image to video output, to executing a flawless Stable Video Diffusion installation guide, you now possess the blueprint to build your own uncensored, zero-cost AI animation studio.
Remember the core takeaways for a successful workflow:
- Start with a strong foundation: Use high-quality images generated from tools like Midjourney or Stable Diffusion as your base.
- Go Local: Embrace interfaces like ComfyUI or Pinokio to access AI video tools with no daily usage caps and bypass content filters.
- Master the Prompt: Use precise Prompt engineering for cinematic AI motion to control the virtual camera and subject action.
- Polish in Post: Utilize High resolution image to video workflows with AI upscalers (Upscayl) and frame interpolators (Flowframes) to turn raw outputs into professional, 4K 60fps footage.
The days of wondering how to animate photos without subscription or searching endlessly for No watermark AI video generators are over. The open-source community has handed you the keys to the studio. Download the models, spin up your GPU, and start creating without limits. Your only restriction now is your own imagination.