

Have you ever walked into a room and immediately felt a sense of calm, or driven past a house and found yourself captivated by its striking curb appeal? That is the undeniable power of color. The shades, tones, and hues you select for your living spaces do much more than simply cover drywall or siding; they dictate the mood, define the architecture, and ultimately reflect your personal style. Get the Best information about professional home painting.
However, translating the vision in your head onto the walls of your property is a complex journey. Choosing the perfect palette is only the first step. Ensuring those colors are applied flawlessly, stand the test of time, and genuinely elevate your property requires a comprehensive understanding of aesthetics, materials, and execution. This is where the art of color selection intersects with the science of professional home painting.
In this exhaustive guide, we will cover everything you need to know to transform your spaces. We will dive deep into color psychology, room-by-room interior strategies, and exterior curb appeal tactics. More importantly, we will bridge the gap between choosing your dream colors and making them a reality, covering everything from proper preparation to the final coat.
The Psychology of Color: How Hues Impact Your Home
Before you even look at a paint swatch or consider hiring a contractor, it is crucial to understand how color functions on a psychological level. The colors you choose will directly influence how you and your guests feel when interacting with your space.
Warm Colors vs. Cool Colors
Colors are generally divided into two main categories: warm and cool. Understanding the difference is foundational to your design strategy.
- Warm Colors: Reds, oranges, yellows, and warm earthy browns. These colors are known to stimulate energy, evoke feelings of warmth, and draw the walls of a room visually closer, making large, cavernous spaces feel more intimate. They are excellent choices for spaces where activity and conversation are encouraged, such as dining rooms and family rooms.
- Cool Colors: Blues, greens, and purples. These hues recede visually, making a space feel larger and more open. Cool colors are inherently calming, soothing, and relaxing. They mimic the colors of nature—water, sky, and foliage—making them ideal for bedrooms, bathrooms, and home offices where focus and tranquility are paramount.
The Role of Neutrals
Neutrals—whites, grays, beiges, taupes, and greiges (a blend of gray and beige)—are the unsung heroes of interior design. They serve as the foundational backdrop that allows your furniture, artwork, and architectural details to shine.
When choosing neutrals, you must pay attention to their undertones. A gray paint might look perfectly neutral in the store, but once applied to your walls, it might flash blue, green, or even purple depending on the lighting. Always test neutral colors in your actual space before committing to gallons of paint.
Mastering Interior Painting: A Room-by-Room Guide
When executing an interior painting project, a one-size-fits-all approach to color rarely yields the best results. Each room serves a different purpose, and the color palette should reflect and enhance that specific utility.
The Living Room: Creating a Welcoming Hub
The living room is the social epicenter of the home. It needs to feel welcoming to guests while remaining comfortable for daily family life.
- Color Suggestions: Soft earth tones, warm off-whites, and gentle greiges are universally appealing. If you want a more dramatic look, consider a deep, moody accent wall in navy blue or hunter green, balanced by lighter surrounding walls.
- Pro Tip: Because the living room is often the largest room in the house, it sets the color tone for adjoining hallways and open-concept spaces. Choose a primary color here that can easily transition into other areas.
The Kitchen: The Heart of the Home
Kitchens are high-energy spaces filled with movement, heat, and aromas. The colors here should be appetizing and uplifting.
- Colour Suggestions: Warm buttery yellows, crisp apple greens, or even bold terracotta can add vibrancy to a kitchen. Alternatively, crisp white kitchens remain timeless, allowing the color of the cabinetry, backsplashes, and countertops to take center stage.
- Choosing the Right Finish: Kitchens are prone to splatters, grease, and moisture. When selecting your paint, it is crucial to choose finishes for high-traffic areas. A satin or semi-gloss finish is highly recommended for kitchen walls because it is significantly easier to wipe down and resists moisture better than flat or eggshell finishes.
The Bedroom: Your Personal Sanctuary
Your bedroom is your retreat from the world. The primary goal of bedroom colors is to promote relaxation and restful sleep.
- Color Suggestions: Soft, muted blues, sage greens, and lavender are scientifically proven to lower heart rates and reduce stress. If you prefer warmer tones, opt for a soft, dusty peach or a warm, creamy beige rather than an energetic red or bright yellow.
- Lighting Considerations: Pay attention to how the morning and evening light hits your bedroom walls. A color that looks beautiful in the bright afternoon sun may look dreary under artificial bedside lamps.
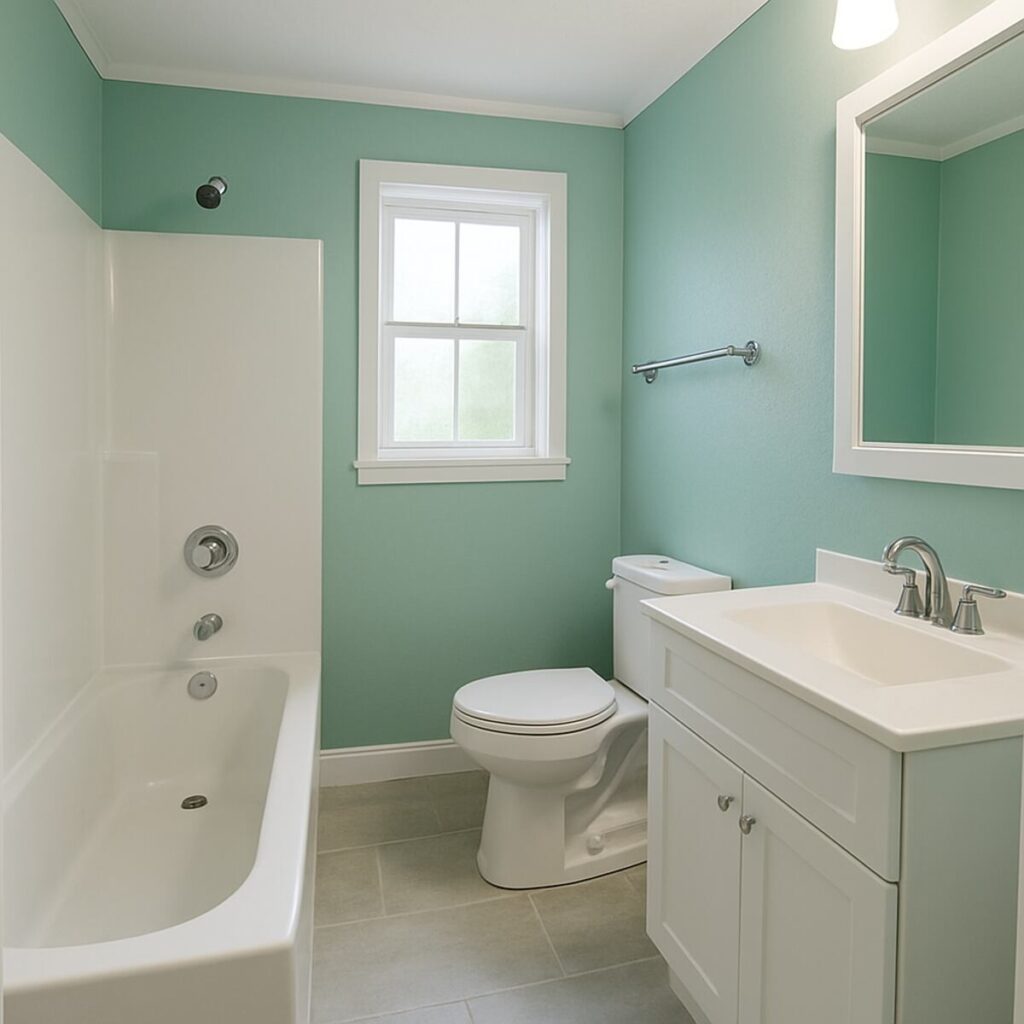
The Bathroom: Clean and Serene
Bathrooms are generally smaller spaces, but they play a vital role in starting and ending your day.
- Color Suggestions: Spa-like colors work best here. Icy blues, seafoam greens, and bright, clean whites make the space feel sanitary, fresh, and expansive.
- Environmental Considerations: Bathrooms are high-humidity environments. Even with good exhaust fans, the walls will be subjected to steam. Like the kitchen, opt for satin or semi-gloss finishes to protect the drywall from moisture penetration.
The Technical Side of Interior Color
Choosing the color is just the beginning. The technical aspects of the paint itself will dictate how the color performs over time, how it affects your health, and how difficult it will be to apply.
Prioritizing Indoor Air Quality
Historically, interior paints were loaded with Volatile Organic Compounds (VOCs). These are chemical solvents that release gases as the paint dries—responsible for that strong “new paint” smell. However, these emissions can cause headaches, dizziness, and long-term respiratory issues.
Today, taking advantage of the benefits of low-VOC paint is non-negotiable for the health-conscious homeowner. Low-VOC and Zero-VOC paints offer the same rich color saturation and durability as traditional paints but without the harmful off-gassing. This is especially vital when painting nurseries, bedrooms, or homes occupied by individuals with asthma or allergies. Furthermore, low-VOC paints dry faster and allow you to re-occupy the newly painted room almost immediately without enduring lingering chemical odors.
The Challenge of Dark and Dramatic Colors
Deep, saturated colors—like emerald green, charcoal gray, or navy blue—are incredibly popular for dining rooms, home theaters, and accent walls. They add a level of sophistication and coziness that light colors simply cannot match. However, from an application standpoint, dark colors are notoriously finicky.
If you are wondering how many coats are needed for dark paint, the answer is rarely just one or two. Dark pigments require a highly specific application process:
- Tinted Primer: Never use a standard white primer under a dark topcoat. A professional painter will always use a high-build primer tinted to a gray shade that complements the final dark color.
- Multiple Topcoats: Even with premium paint, dark colors often require three to four coats to achieve a uniform, streak-free finish. Because dark colors reflect light differently, any inconsistencies in the roller application (called “holidays” or “flashing”) will be glaringly obvious.
Understanding the Cost Implications
When planning an interior transformation, budgeting is a primary concern. Understanding the interior painting cost per square foot helps you set realistic expectations.
On average, professional interior painting ranges from $2 to $6 per square foot of floor space. However, this number fluctuates based on several variables:
- Wall Height: Standard 8-foot ceilings are cheaper to paint than vaulted 12-foot ceilings, which require scaffolding and specialized equipment.
- Prep Work: If your walls have excessive nail holes, drywall damage, or require heavy wallpaper removal, the cost will increase.
- Trim and Detail: Painting baseboards, crown molding, window casings, and doors requires meticulous brushwork, which adds to labor costs.
- Color Changes: Going from a dark wall to a light wall (or vice versa) requires more primer and more coats, directly impacting the final price.
Exterior Painting: Color and Curb Appeal
While interior colors are for your personal enjoyment, exterior colors are for the world to see. Exterior painting is one of the most impactful home improvement projects you can undertake. It protects your home from the elements and serves as the primary driver of your property’s curb appeal.
Choosing an Exterior Palette
Selecting exterior colors requires a different mindset than interior design. You must consider the fixed elements of your home and the surrounding environment.
- Consider Fixed Elements: You cannot easily change the color of your roof shingles, your brick or stone masonry, or your driveway. Your paint color must harmonize with these permanent features. For example, a home with a warm terracotta roof pairs beautifully with warm creams and subtle olive greens, but might clash terribly with a cool, stark gray.
- Neighborhood Context: While you want your home to stand out, you don’t want it to stick out for the wrong reasons. Observe the color palettes in your neighborhood. Aim for a color scheme that complements the surrounding homes while still expressing your individuality.
- The Rule of Three: A classic exterior palette consists of three colors:
- The Field Color: The main color of the siding or stucco.
- The Trim Color: Used for window casings, eaves, and fascia boards. This is usually a lighter shade to create crisp architectural lines.
- The Accent Color: Used sparingly for doors and shutters to provide a pop of visual interest (e.g., a bright red or deep glossy black front door).
ROI: Painting for Profit
If you are considering selling your property in the near future, the right exterior color choice is a strategic financial decision. A fresh, modern, and widely appealing exterior paint job is proven to increase home resale value.
Real estate experts continually rank exterior painting as a project with a massive return on investment (ROI), often recouping over 100% of its cost at the time of sale. Buyers form an opinion about a house within the first ten seconds of pulling into the driveway. A home with faded, peeling paint signals to buyers that it has been neglected, prompting them to wonder what unseen maintenance issues lurk inside. Conversely, a crisp, flawless exterior suggests a turnkey property, allowing sellers to command a premium price.
Adapting to Exterior Materials: The Stucco Example
Exterior color isn’t just about the paint; it’s heavily dependent on the substrate (the material being painted). Siding, brick, wood, and stucco all accept paint differently and require specific product formulations.
For instance, homes with stucco exteriors present unique challenges. Stucco is highly porous and prone to hairline cracking as the house settles or experiences temperature fluctuations. Standard exterior acrylic paints are often insufficient. Instead, professionals highly recommend elastomeric coatings for stucco.
Elastomeric paint is significantly thicker than standard paint—sometimes up to ten times thicker. When applied properly, it creates a tough, flexible, waterproof membrane over the stucco. As the stucco expands and contracts, the elastomeric coating stretches, bridging hairline cracks and preventing water from penetrating your home’s exterior envelope. This not only preserves the beauty of your chosen colour but also protects the property’s structural integrity.
The Foundation of Color: Masterful Preparation
The greatest paint in the world, in the most beautiful color imaginable, will fail if it is applied over a poorly prepared surface. In the world of professional painting, the actual application of color is often the quickest part of the job. The vast majority of the time is spent on preparation.
Exterior Prep: Defending Against the Elements
Proper exterior surface preparation techniques are the bedrock of a long-lasting paint job. Skipping these steps guarantees premature paint failure, bubbling, and fading.
- Thorough Cleaning: Over the years, exterior walls accumulate dirt, mold, mildew, algae, and chalky residue from old paint. A professional crew will typically power wash or soft wash the entire home using specialized biodegradable detergents. Paint will not adhere to a dirty or chalky surface.
- Scraping and Sanding: Any loose or flaking paint must be entirely removed. This is critical if you need to fix peeling paint on siding. Simply painting over peeling paint is a temporary bandage; the new paint will quickly peel off right along with the old layer. Professionals use specialized scrapers, wire brushes, and power sanders to feather the edges of the remaining paint, ensuring a smooth transition.
- Repairing Substrates: Rotted wood fascia boards must be replaced. Gaps around windows and doors must be resealed with high-quality, paintable, exterior-grade caulking. Cracks in stucco or masonry must be patched and cured.
- Priming: Bare wood, repaired areas, and heavily chalked surfaces must be spot-primed or fully primed with an exterior bonding primer to ensure the topcoat adheres properly.
The Critical Issue of Lead Paint
When preparing older homes, preparation takes on a serious health and safety dimension. If your home was built prior to 1978 (the year lead-based paint was banned for residential use in many regions, including the US), there is a high probability that the original layers of paint contain lead.
When intact, lead paint poses minimal risk. However, the preparation process—scraping, sanding, and heat-treating—creates lead dust, which is highly toxic if inhaled or ingested, particularly for young children and pregnant women.
This is where DIY ends and professional necessity begins. Reputable contractors strictly adhere to lead-paint safety protocols (such as the EPA’s Renovation, Repair, and Painting (RRP) rule in the US). These protocols include:
- Using HEPA-filtered vacuum attachments on power sanders.
- Sealing off work areas with heavy-duty plastic sheeting.
- Wearing specialized disposable Tyvek suits and P100 respirators.
- Wet-sanding techniques to minimize airborne dust.
- Meticulous daily cleanup and disposal of hazardous debris.
Attempting to scrape an older home without understanding these protocols poses a massive health risk and is a primary reason hiring certified professionals is non-negotiable for historic properties.
Application Techniques: Bringing the Color to Life
Once the surface is flawlessly prepped, the color application begins. The method of application greatly influences the final texture, coverage, and appearance of your chosen color.
When discussing spray vs brush painting methods, there is a great deal of misconception. Many homeowners believe that spraying is “cutting corners,” while brushing and rolling is the only authentic way to paint. The reality is that professional painters use a combination of all three techniques, leveraging the strengths of each.
The Art of Spraying
Airless sprayers are incredibly powerful tools in a professional painter’s arsenal.
- The Pros: Spraying atomizes the paint, delivering an exceptionally smooth, glass-like finish that is virtually impossible to achieve with a brush or roller. It is the absolute best method for painting louvered doors, intricate crown molding, kitchen cabinets, and heavily textured exterior surfaces like rough-sawn cedar or deep stucco, where a roller cannot reach into the crevices.
- The Cons: Spraying requires extensive masking and taping. Because the paint is atomized, overspray can drift. A professional must spend hours wrapping windows, covering floors, and masking hardware before ever pulling the trigger on a spray gun.
Brushing and Rolling (Back-Rolling)
For broad interior walls, the traditional roller remains the gold standard. It provides a subtle, uniform stipple (texture) that helps hide minor drywall imperfections.
- The Pro Technique: Back-Rolling. When painting porous exteriors, professionals often combine methods. One painter will spray the paint onto the siding to quickly deliver a heavy volume of color, while a second painter follows immediately behind with a thick-nap roller, physically pushing the wet paint deep into the grain of the wood or the pores of the masonry. This technique ensures maximum adhesion and a uniform color coat.
Project Management: Timelines and Timing
A full-scale house painting project is a major logistical undertaking. Understanding the timeline and the seasonal nuances will make the process significantly less stressful.
Seasonal Considerations
Deciding on the best time to paint house exteriors is heavily dependent on your local climate. Exterior paint requires specific conditions to cure properly.
- Temperature Restrictions: Most acrylic latex exterior paints require ambient and surface temperatures to be between 50°F and 85°F (10°C to 29°C) for several days. If it’s too cold, the paint won’t cure, leading to premature failure. If it’s too hot, the paint flashes and dries too quickly, preventing it from binding to the surface and resulting in visible lap marks.
- Moisture is the Enemy: You cannot paint wet wood. Following rain, a professional crew will wait for the substrate to dry completely, often using moisture meters to verify the wood’s internal moisture content before applying primer. Therefore, the dry, mild seasons of late spring and early autumn are generally the optimal windows for exterior painting.
Interior painting, however, is a year-round activity, provided the home is climate-controlled. In fact, booking an interior project during the winter can sometimes yield better rates from contractors who are looking to keep their crews busy during the exterior off-season.
What to Expect: The Project Timeline
Understanding the standard house painting project timeline helps you prepare your household for the disruption. While every home is unique, a typical full-exterior painting project for an average-sized home looks like this:
- Day 1: Power Washing. The crew arrives to chemically clean and wash the home. The house must then be left to dry for at least 24 to 48 hours.
- Day 2-3: Masking and Extensive Prep. This is the messy phase. Scraping, sanding, caulking, and wood repairs take place. Windows, doors, roofing, and hardscaping are masked off with plastic and tape.
- Day 4: Priming. Bare wood and repaired areas are primed.
- Day 5-6: Application of the Main Body Color. The primary siding or stucco color is applied, usually requiring two coats for optimal durability and color depth.
- Day 7: Trim and Accents. The fine detail work begins. Fascia, window trims, doors, and shutters are painted, often by hand with high-quality brushes to ensure sharp lines.
- Day 8: Unmasking, Touch-ups, and Final Walkthrough. The protective plastic is removed, the site is thoroughly cleaned, and the project manager walks the property with the homeowner to ensure every detail meets their standard.
The Value Proposition: Professional vs. DIY
Armed with color chips and a burst of weekend enthusiasm, many homeowners consider taking on painting projects themselves. However, the gap between an amateur paint job and professional home painting is vast, both in aesthetics and longevity.
When evaluating pro painters vs DIY costs, homeowners often only consider the price of paint and brushes. They fail to factor in:
- Equipment Costs: Professionals arrive with thousands of dollars worth of equipment: heavy-duty extension ladders, scaffolding, airless sprayers, commercial power washers, dust-extraction sanders, and high-quality brushes that cost $20-$30 apiece. Buying or renting this equipment significantly inflates the DIY budget.
- The Value of Time: A team of four professional painters can transform an entire house exterior in a week. A lone homeowner working on weekends might take two months to complete the same job, enduring weeks of living in a messy construction zone with ladders strewn across the lawn.
- Durability and Warranty: A poor DIY prep job might look fine for the first six months, but after one harsh winter or scorching summer, the paint will likely begin to crack and peel. Reputable professionals offer warranties on their labor, providing peace of mind that the investment is protected.
- Flawless Finish: Professional painters possess the muscle memory, technique, and trained eye to cut perfectly straight lines where the ceiling meets the wall, avoid roller marks, and ensure uniform color saturation.
The true cost of a DIY project that fails is paying a professional to come in, strip out the failed work, and do it right the second time.
Bringing It All Together: Hiring the Right Team
If you have chosen your perfect colors and recognized the value of professional execution, the final and most crucial step is to hire reliable painting contractors. The painting industry has a low barrier to entry, which means many unqualified individuals masquerade as professionals.
Rigorous vetting local painting services is essential to protect your home and your wallet. Do not simply hire the lowest bidder; an abnormally low bid usually indicates that the contractor intends to cut corners on preparation, use cheap, watered-down paint, or lacks proper insurance.
A Checklist for Vetting Contractors
When interviewing potential painting companies, use this criteria to separate the true professionals from the amateurs:
- Detailed Written Estimates: A professional will never give you a price written on the back of a business card. You should receive a comprehensive written proposal that details:
- The exact scope of work (which rooms, which exterior walls).
- The specific preparation steps they will take.
- The exact brand, line, and finish of the paint they intend to use (e.g., specifying Sherwin-Williams Emerald Satin rather than just saying “premium paint”).
- The number of coats guaranteed.
- License and Insurance Verification: Never hire an uninsured contractor. Ask for physical proof of both General Liability Insurance (which protects your property if they damage it) and Worker’s Compensation Insurance (which protects you from liability if a painter is injured on your property).
- References and Portfolio: Ask for a list of recent references, ideally in your neighborhood. Drive by the exterior jobs they completed three or four years ago to see how their work holds up over time.
- Clear Warranty Terms: What does their warranty cover? A standard industry warranty is 2 to 3 years on labor and peeling. Ensure the warranty terms are explicitly stated in the contract.
- No Massive Upfront Deposits: While a small deposit (10% to 20%) to secure a spot on the schedule and purchase custom-tinted materials is standard, you should never pay a contractor more than 50% upfront. Payment should be tied to project milestones, with the final balance only due after the final walkthrough and your complete satisfaction.
Conclusion: The Transformative Power of Color Executed Right
Choosing the right colors for your home is an exciting, highly personal endeavor. Whether you are aiming to create a tranquil interior sanctuary with cool, low-VOC tones or to dramatically boost your property’s curb appeal and resale value with a striking, weather-resistant exterior palette, the colours you choose are the voice of your home.
However, color is only as good as the canvas it rests upon and the hands that apply it. From navigating the complexities of color theory and high-traffic finishes to executing rigorous exterior surface preparation and adhering to critical lead safety protocols, the science of painting is vast.
By partnering with a team dedicated to professional home painting, you ensure that your vision isn’t just slapped onto a wall, but meticulously crafted. You bridge the gap between inspiration and reality. So, take your time browsing those color swatches, dream big, and when you are ready, hire the experts who can make those colors vibrantly, durably, and beautifully come to life. Your home—and your peace of mind—deserves nothing less.